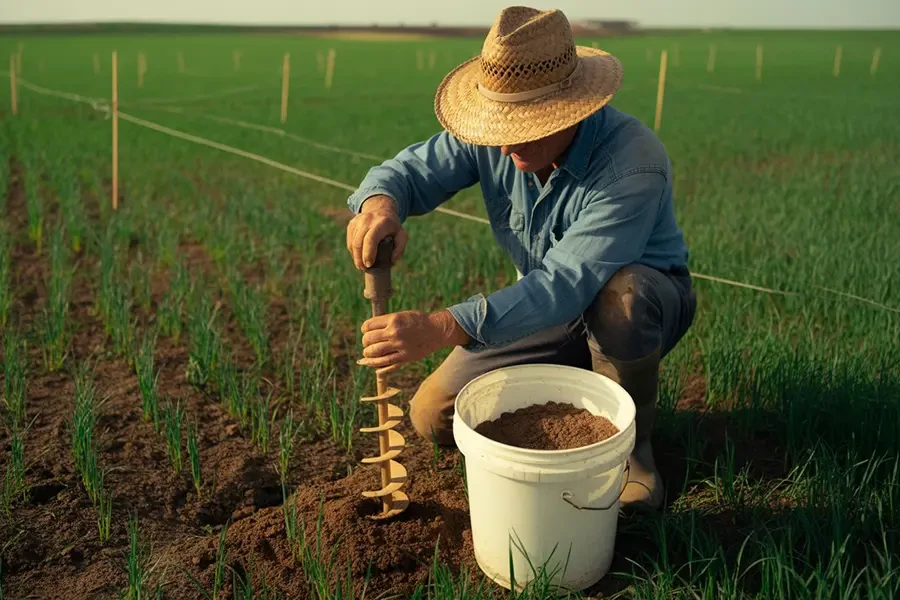
خاک بستر اصلی رشد گیاهان است و سلامت آن بهطور مستقیم بر کیفیت و کمیت Products اثر میگذارد. گاهی کشاورزان با کاهش عملکرد، زردی برگها یا رشد ضعیف گیاهان روبهرو میشوند و بیشتر مواقع دلیل اصلی این Subject، ترکیب نامتعادل عناصر خاک است. در چنین شرایطی، تنها راه مطمئن برای شناخت نیاز واقعی زمین، انجام آزمون خاک است.
در این مقاله از Asia potash industry agricultural magazine, the concept of soil test, its importance in economic saving, sampling methods and application of the results in fields, gardens and even houseplants will be investigated. You will also learn about common errors in this process and how to prevent them.
What is a soil test?
Soil testing is a set of laboratory measurements and analyzes that are performed on soil samples to determine the state of nutrients, acidity or alkalinity (pH), salinity, organic matter, and other important indicators. The main purpose of this test is to provide practical information for managing plant nutrition and increasing land productivity.
In general, the soil test shows the farmer a comprehensive picture of the health and fertility of the soil and determines what capabilities the land has and what reforms are needed for better exploitation.
The difference between soil test and leaf decomposition test
In addition to the soil test, a type of test is performed on the plant Leaf decomposition test or it is called plant tissue test. In this method, instead of soil, plant tissues such as leaves or stems are analyzed to determine the amount of nutrients absorbed by the plant.
The difference between these two tests is that the result of the soil test shows the capacity and conditions of the growing environment, while the plant tissue test examines the actual nutritional status of the plant.
What is the importance of soil testing?
The importance of soil testing can be summarized in several main axes:
- Fertilization optimization: Without soil testing, farmers usually apply fertilizers based on experience or general recommendations, and this can lead to using the wrong amount of fertilizer. Symptoms of high fertilization appear in products.
By providing accurate information, soil testing helps farmers apply the right fertilizer in the right amount and at the right time.
- Economic savings: The cost of fertilizers constitutes a significant part of agricultural expenses. When we know exactly what materials the earth needs, excessive consumption can be avoided and as a result costs will be lower.
- Protection of water and soil resources: The excessive use of chemical fertilizers, in addition to not being beneficial for the plant, causes the pollution of underground water resources and the destruction of the soil structure. Soil testing is a way to prevent these damages.
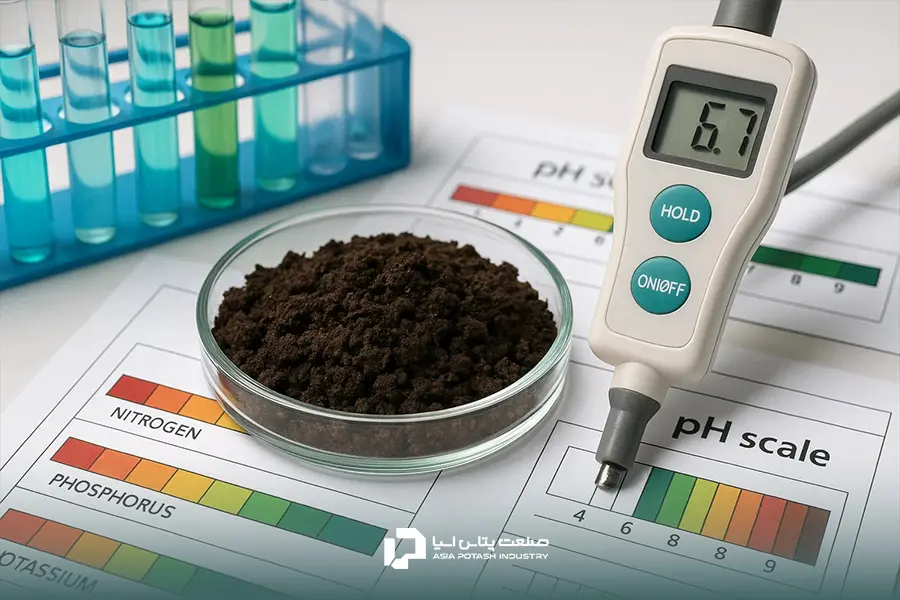
What things are measured in the soil test?
In the soil test, depending on the purpose and type of product, different things are measured. The most important of them are:
- Soil pH: Soil pH determines its acidity or alkalinity and has a direct effect on the plant’s access to nutrients.
- Electrical conductivity (EC): Electrical conductivity is an indicator for measuring soil salinity, which is very important in arid and semi-arid areas.
- Amount of organic matter: The presence of organic matter makes the soil more fertile and increases the water and food storage capacity.
- Absorbable nitrogen, phosphorus and potassium: These three elements are the most important soil elements that play a vital role in the growth of plants. Farmers who know What is potassium sulfate fertilizer? And what are its advantages, to check the land and evaluate this element, they must take a soil test.
- Micronutrients such as iron, zinc, manganese and copper: Infrequent but essential elements whose deficiency can cause a severe reduction in crop performance.
Sampling methods for soil testing
Soil sampling is the most important step in the entire soil testing process, because if the sample is not taken correctly, even the most accurate laboratory cannot give you reliable results.
In agriculture, there are several main methods for sampling, each of which is recommended for specific conditions:
1. Coordinate axis method
In this method, the earth is considered as a hypothetical rectangle or square. Then, using coordinate axes, points with regular intervals on the ground are specified. A sample is taken from each designated point and finally the samples are combined.
This method is mostly used for lands that have relative uniformity in texture and slope. Its advantage is that the sampling points are well dispersed on the ground and the final soil sample will show a more accurate result.
2. Networking method
In the grid method, the land is divided into several smaller squares, so that each section is considered a separate plot for sampling. One or more samples are taken from each square and then these samples are combined or sent separately to the laboratory.
This method is highly accurate and is mostly used in fields that have a lot of heterogeneity in the soil composition or the farmer wants to know the exact condition of different parts of the land. Of course, this method is usually used in research projects or valuable gardens due to the higher time and cost.
3. Polygon method
This method is used when the shape of the land is irregular or uneven. In this case, the field is divided into several polygonal parts based on natural features such as elevation and elevation, type of vegetation or soil color change. A separate sample is taken after each polygon.
The advantage of this method is that it better defines the real changes of the land. For example, if a part of the land is steep and the other part is flat, or if a part has lighter and lighter soil, it will be seen in this division and will lead to more accurate results.
4. Zigzag method
The zigzag method is the simplest and most common sampling method. In this method, the farmer moves in a zigzag pattern across the field and collects sub-samples from different points along the way. Then the sub-samples are mixed together and a final composite sample is sent to the laboratory.
This method is very suitable and low-cost especially for fields that are relatively uniform. Of course, in lands with high soil diversity, it may be less accurate than the grid or polygon method.
Important note: If the ground is uniform, the zigzag method or coordinate axis is sufficient; But if there are many differences in soil texture, slope or color, the grid or polygon method will be a better choice.
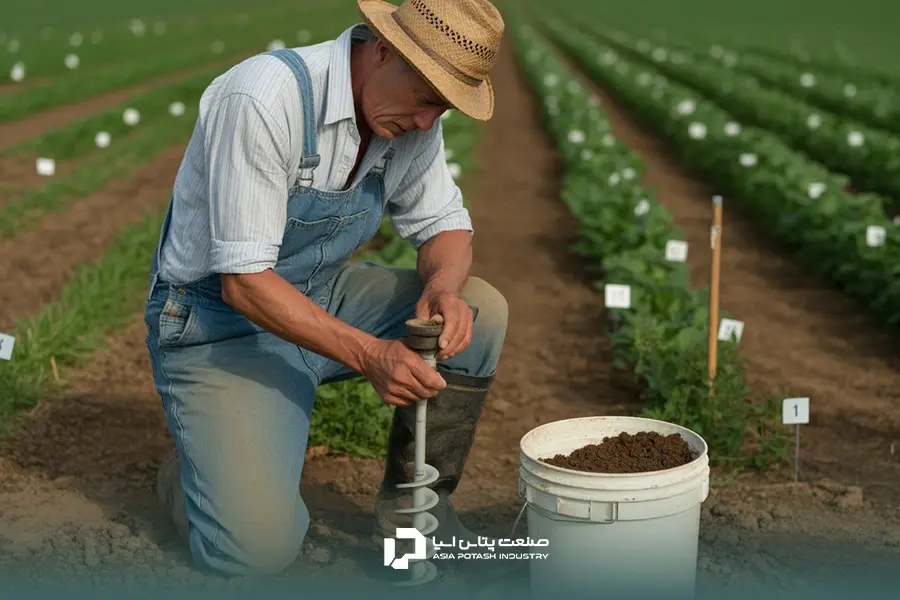
soil sampling; step by step
Soil sampling is not just a simple task like filling a shovel; Rather, it is a set of steps that must be done carefully so that the results of the tests are reliable. In order for your sample to be truly representative of the entire field, the following steps must be followed:
1. Choose the right time
The best time for sampling is before the crop is planted or early in the growing season. Sampling after harvesting is also possible, but provided that at least three to four weeks have passed since the use of chemical or organic fertilizers. The reason for this interval is that the addition of fertilizers can temporarily change the composition of the soil and affect the test results.
2. Tool preparation
The main tools for sampling include a shovel or soil drill, a clean plastic bucket, and a sample bag. It is not recommended to use metal containers or containers covered with soil and fertilizer, because it may change the chemical composition of the sample. It is better to wash the bucket and tools with water before starting work.
3. Determination of withdrawal points
Depending on the selected method (zigzag, grid, etc.), points for harvest are specified. Usually, 8 to 15 points are selected in each hectare to cover the variety of soil.
Sampling should not be done from places such as near watercourses, under certain trees, or places where animal manure accumulates, because these points are not representative of the entire farm.
4. Sampling depth
Harvesting depth depends on the type of product. For crops, 10 to 30 cm is usually enough, because most of the roots are active at this depth. In gardens, sampling is done at two depths: the surface layer (10 to 30 cm) and the bottom layer (30 to 60 cm). This will help to check the nutrient status in both parts of the soil.
5. Collecting and combining subsamples
About 500 grams of soil is removed from each selected point. All the sub-samples are then poured into a clean bucket and mixed well to obtain a composite sample representative of the whole field. If the aim is to investigate specific parts of the land, it is better to keep sub-samples of each part separately.
6. Drying and packing
The composite sample obtained should be spread on paper or a clean surface to dry in the shade and ambient temperature. Drying in direct sunlight or on a heater changes the chemical properties of the soil and affects the test result.
After drying, the soil is sieved and poured into a plastic bag or a clean cloth. The description of the farm, sampling depth, date and name of the owner should be written on the bag.
7. Send to the laboratory
Finally, the prepared sample is sent to the accredited soil laboratory as soon as possible. Long-term storage can change some soil properties such as moisture or nitrogen. The shorter the interval between sampling and testing, the more accurate the results will be.
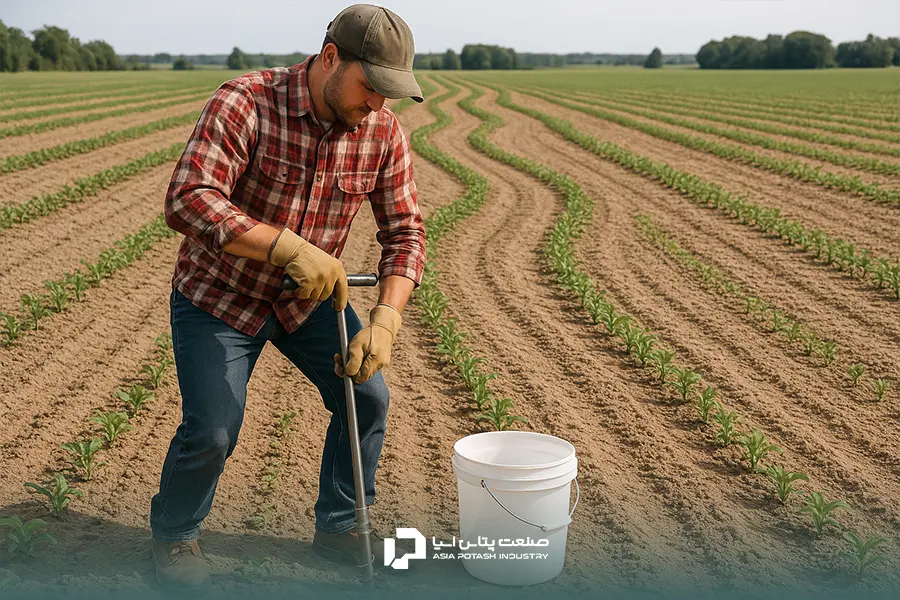
Common errors in soil sampling
In many cases, soil test results differ from actual field conditions. The main reason for this difference is the mistakes that happen in the sampling stage. In addition to wasting the farmer’s money and time, these errors cause the fertilizer program to be adjusted based on incorrect data. The most common mistakes are:
1. Incorrect selection of sampling points
One of the common mistakes in soil sampling is choosing inappropriate points. Sampling from the side of tractor or machine paths, along walls and fences, permanent shade from trees or buildings, areas with temporary flooding or erosion, and even areas that have been recently plowed or modified can distort the result.
The soil in these areas is usually denser, richer or different than other parts of the land and does not represent the true composition of the farm soil.
2. Ignoring the depth of the soil
Sometimes the farmer harvests only from the surface layer of the soil, while the nutrients are also present in the lower layers. For arable and horticultural crops, neglecting the proper depth (30 or 60 cm) leads to missing vital information about nutrient status in the soil profile.
3. Sample contamination
Using contaminated utensils or tools is another important mistake. If the soil sample is mixed with chemical fertilizers, oil, metals, or even soil from another part, the test results will lose their accuracy. Using a clean bucket and shovel and avoiding direct hand contact with the sample will prevent contamination of the sample.
4. Mixing heterogeneous samples
Lands with different conditions (such as steep and flat or light and heavy soil) should not be combined in a composite sample. This makes the mean test result unrealistic. In such a situation, it is better to prepare a separate sample for each part of the land.
5. Improper drying
Placing the soil sample in direct sunlight or heat causes the chemical composition of the soil to change. Some elements such as nitrogen and sulfur are vaporized or oxidized due to intense heat and unrealistic results are obtained. Drying should be done in the shade and at room temperature.
6. Neglecting to register details
Forgetting to include information on the sample package (such as farm name, date, sample depth, and desired product) will prevent the lab from interpreting the data correctly. This is a simple but very important mistake that can ruin all your sampling efforts.
Guide to interpreting soil test results
A soil test is only valuable if the results are interpreted correctly. The test sheet usually includes values for soil pH, electrical conductivity (EC), soil organic matter, nitrogen, phosphorus, potassium, and micronutrient elements such as iron, zinc, and manganese.
At first glance, these numbers may be confusing, but they actually provide accurate guidance for land management.
1. Soil pH and its importance
Soil pH indicates the acidity or alkalinity of the soil and includes a range between 4 and 9. Most plants grow best in the 6 to 7 range. with Adjusting soil pH The absorption of nutrients such as calcium, iron and zinc will be possible for the roots.
2. electrical conductivity (EC)
EC shows the amount of dissolved salt in the soil. The high level of this index indicates soil salinity, which limits the growth of many plants.
If EC exceeds 4 decisiemens/m (dS/m), there is a possibility of serious damage to sensitive plants.
3. Consumable elements (macro)
Nitrogen, phosphorus and potassium play the most important role in growth. The test sheet usually reports the amount of these elements as absorbable. The lack of any element causes damage to different parts of the plant. Comparing this data with standard tables tells the farmer how much fertilizer is needed.
4. low consumption elements (micro)
Iron, zinc, manganese, boron and copper are needed by the plant in very small amounts, but their absence can cause heavy damage. For example, zinc deficiency is very common in vineyards and citrus orchards and causes the leaves to remain small. The soil test helps identify and eliminate the deficiency of these elements before symptoms appear.
5. Attention to soil texture
The test results are usually presented along with determining the soil texture (sand, clay or loam). Soil texture plays a role in water and nutrient retention, for example, sandy soils lose nutrients quickly, while clay soils have a greater storage capacity.
6. Soil organic matter
Soil organic matter includes decomposed plant and animal remains, which play a vital role in improving soil structure, increasing water holding capacity, and feeding beneficial soil microorganisms.
The appropriate amount of organic matter for agricultural soils varies between 1 and 5 percent. If this amount is less than 1%, the soil is considered poor and needs to be amended with organic fertilizers or compost. Organic matter also increases the absorption of nutrients such as potassium, calcium and magnesium, and in light soils, it plays an important role in maintaining moisture.
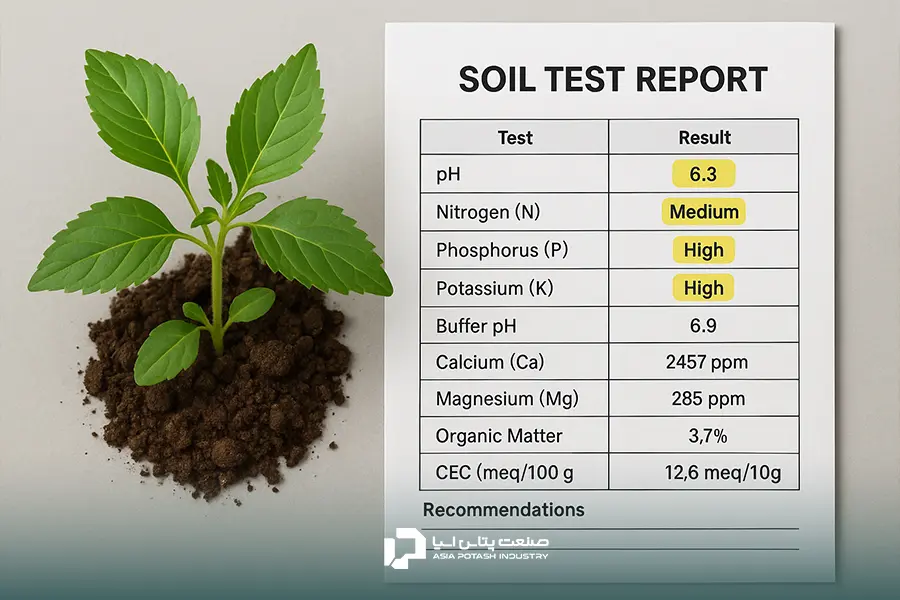
How to use soil test results in agriculture?
The results of the soil test are valuable when they are applied practically in agriculture and horticulture. Depending on the type of product and cultivation environment, the method of using this information is different:
Crops
The results of the soil test in this section help the farmer with the amount and type of fertilizer needed, the time of use and so on crop rotation determine For example, if the potassium level is low, it is better to use High potassium fertilizer Before planting, crop growth and quality should be optimized. Also, phosphorus and nitrogen data allow fertilization to be done without wasting resources and reducing water pollution.
Orchards and fruit trees
In gardens, the condition of the soil is very important due to the presence of deep layers of roots. By analyzing high-use and low-use elements, the nutritional program of trees and soil amendment is implemented in a targeted manner and excessive use of fertilizer is prevented. For example, if the results of the soil test in the apple orchard show a potassium deficiency, it can be done in time Potash fertilizer for apple trees used to maintain the quality of the fruit.
Green space and houseplants
For houseplants or urban greenery, soil sampling is done. This test helps identify the plant’s need for nutrients and optimize fertilization. Especially in small pots, the lack of potassium, nitrogen or phosphorus appears quickly, and regular sampling allows the prevention of reduced growth and yellowing of leaves.
Soil productivity management with Asian potash industry
If you want to get the most out of your soil and ensure the health of your crops, doing a soil test is the first step.
By carefully analyzing the composition of nutrients and the condition of the soil, you can optimize the amount and type of fertilizer and avoid wasting resources.
Sanat Potash Asia Co By providing high-quality fertilizers, it accompanies you in meeting your soil needs.
final word
Soil testing is not only a scientific tool; Rather, the key to intelligent land management is to improve the quality of products and preserve natural resources. By regularly conducting the test and using the results correctly, the farmer and gardener can make economic and sustainable decisions and minimize the risks caused by the excessive use of fertilizer and the reduction of product quality.
Frequently asked questions
To accurately understand the condition of the soil, better planning for fertilization, increasing the quality of products and reducing costs.
Before planting the crop or at the end of the growing season and at least three to four weeks after applying chemical fertilizers.
For agricultural land, it is usually recommended every 2 to 3 years, and for gardens and green spaces, every year or every two years.
Soil pH, salinity (EC), organic matter, high consumption elements such as nitrogen, phosphorus, potassium and low consumption elements such as iron, zinc, manganese and copper.
Yes, even in small pots, soil testing helps identify nutrient deficiencies and improve plant growth with proper fertilization planning.
Comments (0)
Be the first to comment!